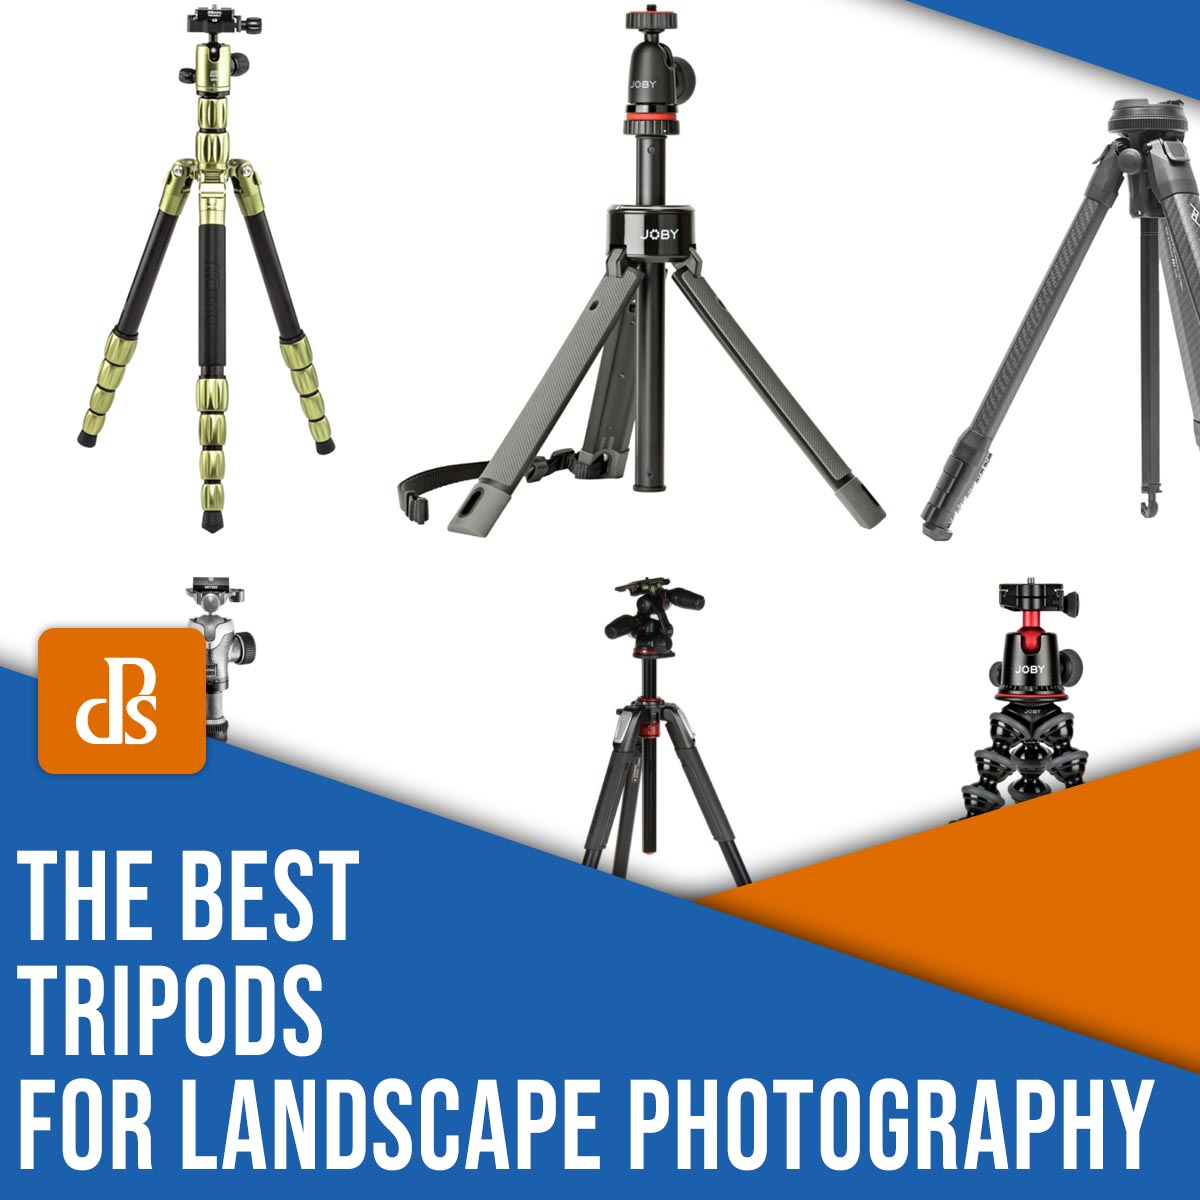
This article was updated in November 2023 with contributions from expert photographers Simon Ringsmuth, Christian Hoiberg, Gavin Hardcastle, and Darren Rowse.
What’s the best tripod for landscape photography you can buy today? When considering the perfect landscape tripod, there are literally hundreds of products to choose from – the tricky part is narrowing down all the options to find one that’s right for you!
This guide will help you wade through the various tripods on the market to find the one that fits your needs. Of course, as with many aspects of photography, it’s difficult to offer a single best tripod to purchase for capturing landscapes. It depends on your goals, your gear, and whether features like budget and portability matter more than height and durability.
I would, however, caution you against getting a very inexpensive, do-it-all model like the kind you might find at a local department store or online retailer for $25-$50 USD. These tripods might seem good, and some have long lists of features, but they are often made with cheap materials that will not hold your camera steady and will break very quickly. So if you’re after a genuinely good tripod for landscape photography, scour this list; you’re certain to find a much better option that suits your needs.
(Also, if you want to learn when you should use a tripod for the best landscape images – and how you should work with a tripod for pro-level results – make sure to read all the way to the end!)
Let’s get started.
1. Peak Design Travel Tripod (Best overall tripod for landscape photographers)
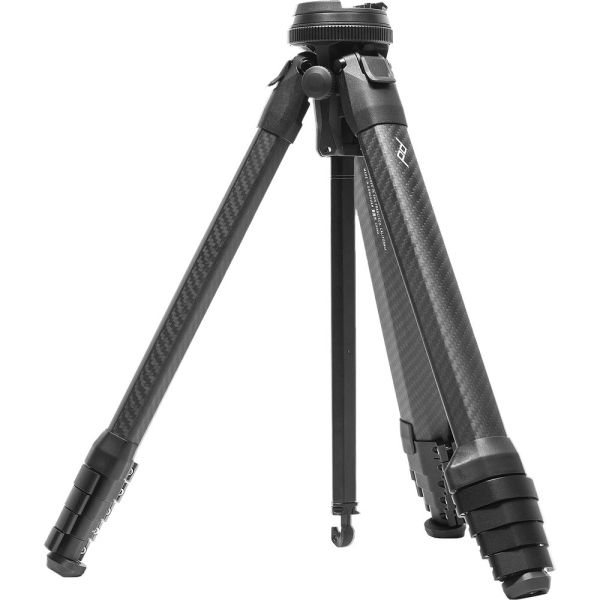
When Peak Design released its Travel Tripod in 2019, it sent shockwaves through the photography community. The tripod was (and is!) small, light, and incredibly versatile, which made it appealing to a wide range of photographers.
All was not sunshine and roses, and shutterbugs quickly took note of some important downsides. This new tripod was expensive, limited in certain ways, and included some highly unconventional design choices. But despite the drawbacks, the Peak Design Travel Tripod earns my recommendation as the absolute best tripod for landscape photography you can buy.
I have used this tripod extensively, from mountaintops in the southwest United States to remote hiking locales along the USA-Canada border, and there’s simply nothing else like it. Its diminutive size when fully collapsed, coupled with the extremely low weight, is a boon to landscape photographers who value quality as well as portability. The built-in ball head is flexible, the legs are stable, and with the center column extended, the entire package is nearly as tall as any other tripod on this list.
I wouldn’t recommend the Peak Design Travel Tripod for use with ultra-heavy cameras, since the thin (but very strong) construction can’t quite keep up when you start attaching pounds of gear. But for most landscape photographers, this tripod hits the sweet spot between size, features, and portability.
Pros
- Outstanding portability
- Highly flexible
- Lots of little design touches, like the phone holder tucked into the center column
Cons
- The carbon fiber version is very expensive
- Not as tall as other tripods
- Not designed for very heavy camera/lens combinations
2. Benro MeFOTO Roadtrip (Best budget landscape tripod)
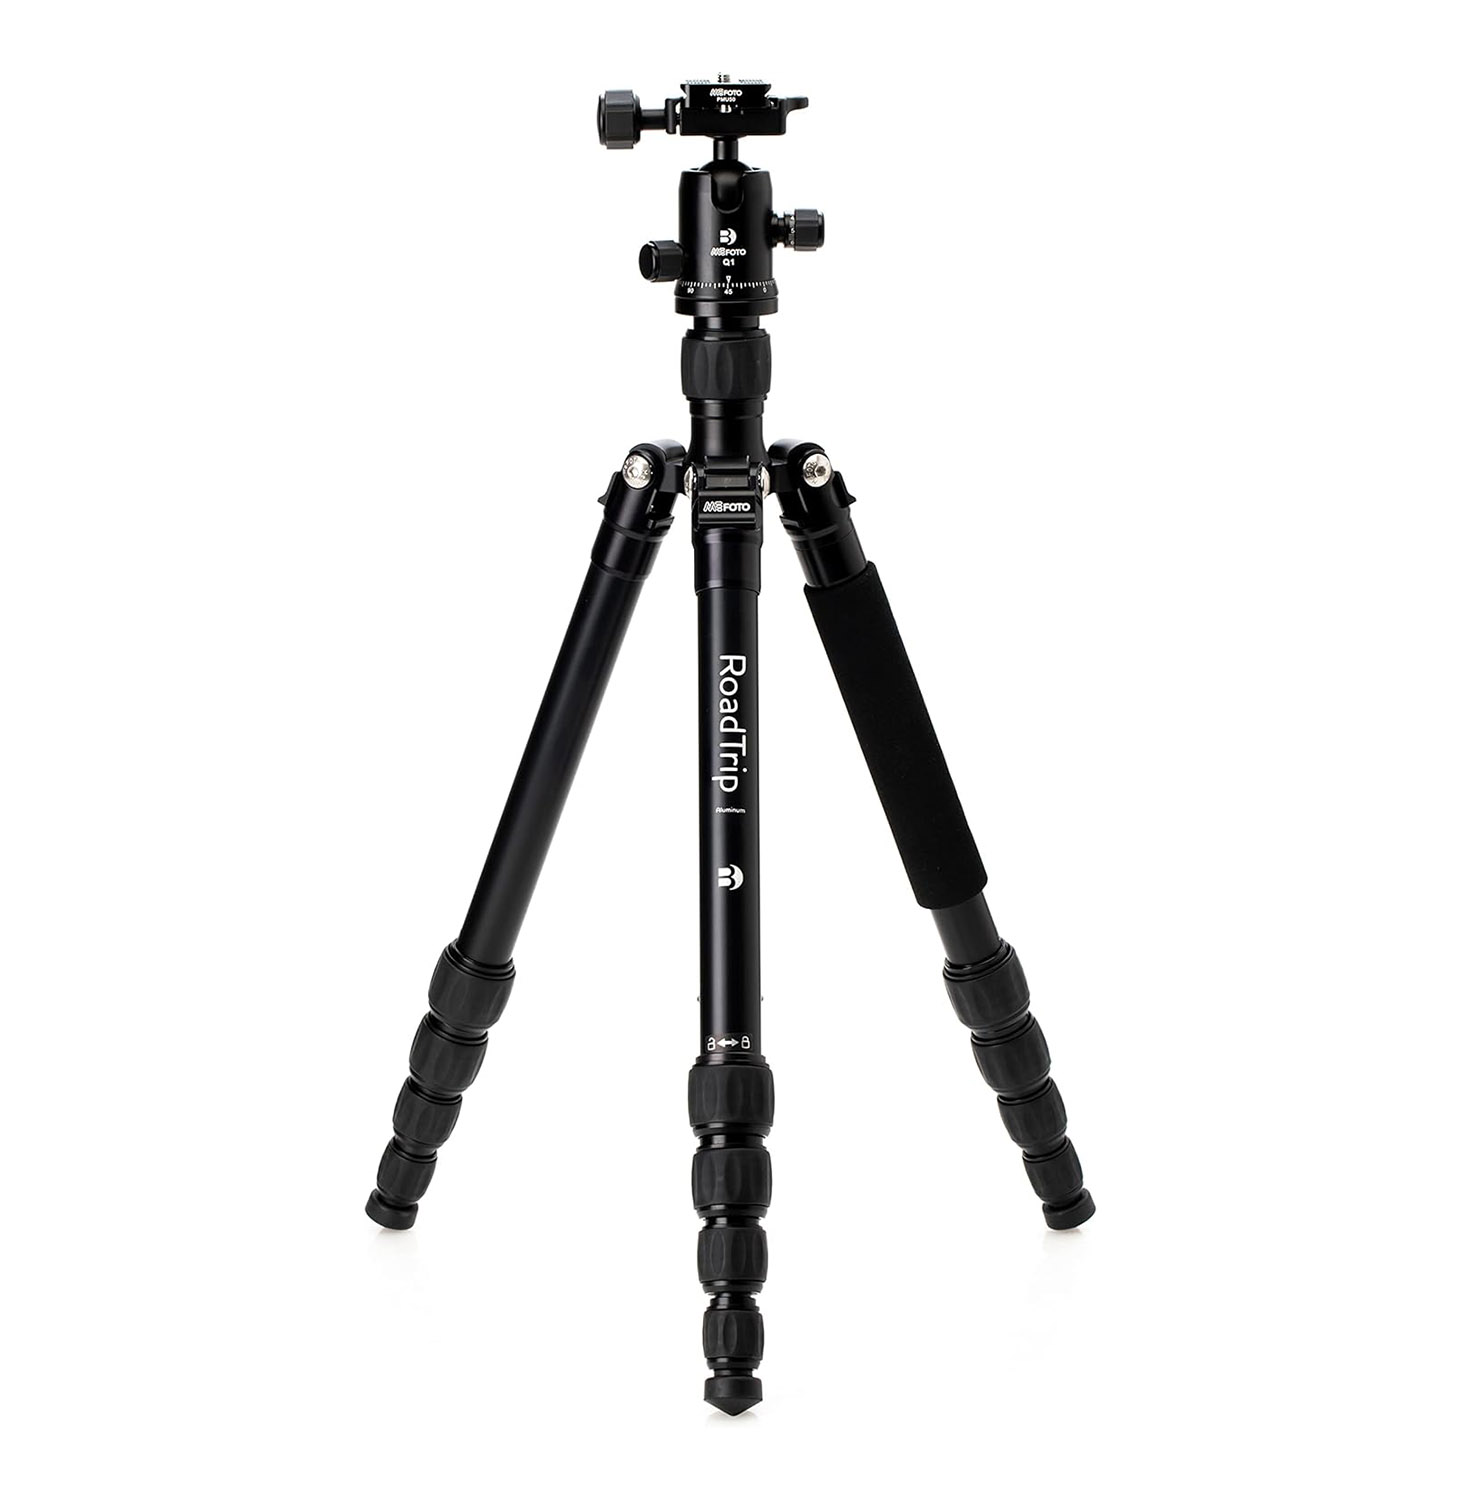
If you’re a landscape photographer on a budget, you can’t go wrong with the Benro MeFOTO Roadtrip. It’s not as compact or versatile as other items on this list, but it offers amazing flexibility – especially considering the price.
The legs fold up around the ball head to save space, and you can lock them into several positions during setup. The center column makes it easy to adjust your landscape photography framing along the vertical axis, and it extends the overall height of this tripod to 61 in (157 cm), which should suit the needs of many landscape photographers reasonably well.
The legs each have a series of twist-lock mechanisms to extend the sections and keep them in place. I’m personally not a big fan of this style and instead prefer the clip-lock or twist-lock systems found on other tripods, but again, the main point of this tripod is to serve a more budget-conscious audience.
One nice feature is the ability to convert it to a true monopod by removing a leg and attaching it to the center column, though that’s not highly relevant for landscape shooters. It does speak to the overall versatility of this tripod, and for photographers who want one inexpensive option for landscapes plus other situations, the Benfro MeFOTO Roadtrip is a solid choice.
Pros
- Inexpensive
- Flexible
- Can be converted to a monopod
- Includes a nice ball head
Cons
- Not as tall as other options
- Twist-lock extension mechanisms aren’t to everyone’s liking
3. Manfrotto MT190XPRO3 with Manfrotto 496 Center Ball Head (Best semi-professional landscape tripod)
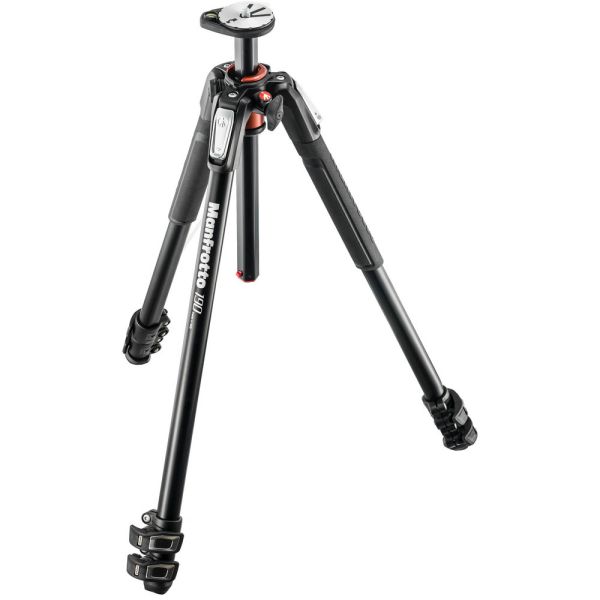
There’s a bit of a paradox with camera gear: the more you spend, the less you get. Whereas many less expensive tripods come with everything you need to go out and start shooting, higher-end tripods often come as two separate pieces: legs and heads. The Manfrotto MT190XPRO3 is an outstanding set of tripod legs, but it also needs a head, and for that I recommend the 496 Center Ball Head.
The Manfrotto legs aren’t small and light so they might not be the first choice for travelers, but they are strong, sturdy, and tall enough to give you unique landscape photos you can’t get with shorter tripods. The legs can be locked into several positions, and adjustments are quick and easy thanks to the clip-lock leg extensions. My favorite feature is the center column adjustment, which lets you extend the column and then reposition it horizontally to capture photos in entirely new ways.
The 496 Center Ball Head refines the design Manfrotto has used for years, and while it doesn’t offer anything particularly revolutionary, it does give you stability and impressive ease of use. Large, chunky knobs let you easily reposition the ball head and then lock it firmly in place, and it’s designed to hold over 20 pounds of gear.
Bottom line: This setup is great for landscape shooters who use professional-grade cameras and lenses and don’t trust their gear to a flimsy support system.
Pros
- Sturdy
- Easy to adjust ball head position
- Simple but effective leg-locking mechanisms
Cons
- Bulky and not ideal for backpacking
- Not as tall as other tripods
4. Gitzo GT2545T Series 2 Traveler (Best professional tripod for landscape photographers)
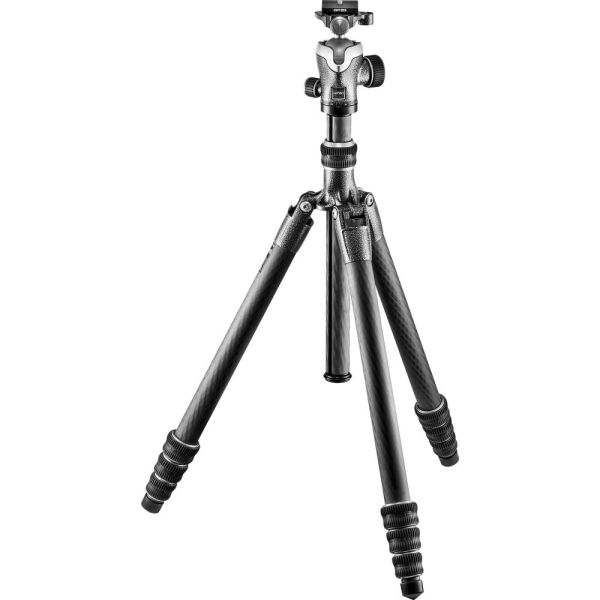
For landscape photographers who want a no-compromise solution to the tripod problem, it’s hard to beat the Gitzo GT2545T Series 2 Traveler. It’s small, lightweight, extends to over five feet, and is designed to take a beating.
Gitzo has made a name for itself in the photography community as a maker of tough, reliable gear for the most demanding situations, and this tripod is no exception. While it’s not quite as small and compact as the Peak Design Travel Tripod, it folds down small enough to fit in most backpacks or suitcases, and the carbon fiber construction keeps it lightweight for hiking out to your favorite landscape photography spots.
This tripod frequently comes paired with a ball head, but you’re free to just buy the legs and choose your own head to fit your needs. However, the often included ball head is great for landscape photographers and one I strongly recommend. Its huge knobs are easy to loosen and tighten, and the head can be moved into nearly any position you need. Unlike some less expensive ball heads, this one is coated with a special material to minimize sticking – perfect for photographers who shoot in inclement weather.
Pros
- Extremely high-quality build
- Very lightweight but capable of supporting large cameras and lenses
- Folds down small for portability
Cons
- Expensive
- Not as compact as others on this list
- Height is decent when fully extended, but not outstanding
5. JOBY TelePod Pro (Best tabletop tripod for landscape photography)
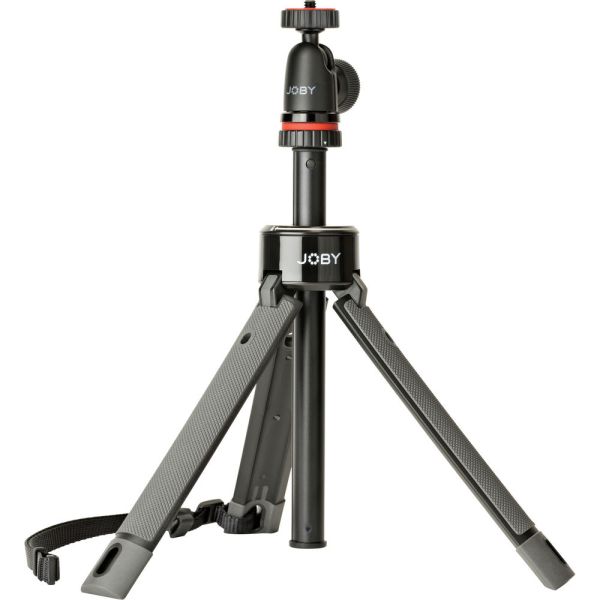
Large tripods that extend high up into the air are great for capturing nature and landscape shots, but sometimes you just need something small and versatile. And if you prioritize compactness over everything else, I recommend the JOBY TelePod Pro.
Designed for small setups like a consumer-grade DSLR or mirrorless camera paired with a lightweight lens, this tripod folds down smaller than a water bottle so you can literally take it anywhere. It has sturdy, rubberized feet and a fairly unique design element: an extendable center column instead of extendable legs. This comes at the cost of stability but helps maintain the outstanding size and portability.
Of course, with the JOBY TelePod Pro, it’s important to keep expectations firmly in check. It’s almost like a selfie stick with three feet, and that makes it unappealing for a lot of longtime landscape photographers. But for those new to this type of photography, or people who don’t have big cameras and lenses, the TelePod Pro is just about perfect.
Pros
- Inexpensive
- Incredibly compact
- Highly portable
- Easy to use in a wide range of landscape situations
Cons
- Not ideal for large cameras
- Extending center column design limits overall stability
6. Feisol Elite Tripod CT-3472LV M2 (Best heavy-duty tripod)
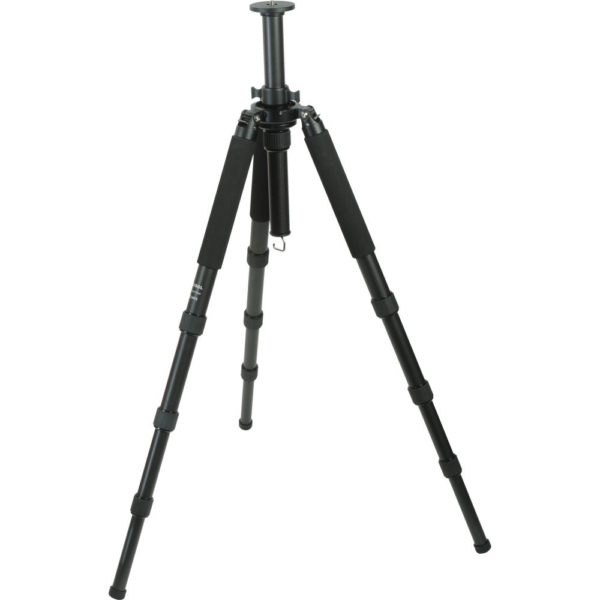
In landscape photography, wind, snow, rain, dirt, dust, extreme heat, and cold are all par for the course – and in such conditions, it helps to have a tripod that will never let you down. That’s where the Feisol Elite Tripod comes in.
It’s a great option for those who value build quality and durability over all else, thanks in part to thick legs capable of holding over 60 pounds, which eclipses just about everything else in its class. The carbon-fiber construction results in a high price tag but a reasonable weight, which is great if you’ll be carrying this on your back or over your shoulder for long distances.
While not as versatile as some other options on this list, the Feisol Elite Tripod does have one key advantage: its size. It’s certainly no tiny, compact device like the Joby TelePod Pro. The Feisol Elite Tripod is approximately two feet long when folded, and it reaches a towering height of nearly six feet to help you get the shots that other landscape photographers can only dream about.
Pros
- Large chunky legs offer amazing stability
- Can support far more weight than other tripods
Cons
- Expensive
- Does not include a ball head
- Not ideal for photographers who value portability
7. Manfrotto MK055XPRO3-3W (Best full-size landscape tripod)
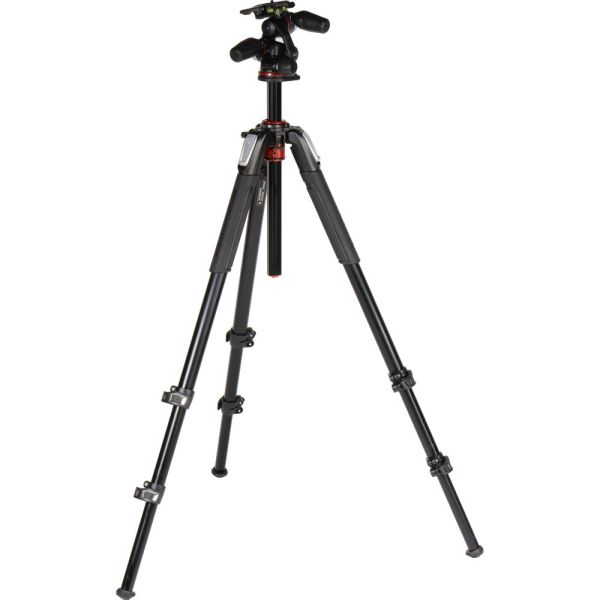
The Manfrotto MK055XPRO3-3W tripod packs everything but the proverbial kitchen sink. Yes, it’s large and definitely not appropriate for long hikes or tromping around through the backcountry, but if you’re a landscape photographer who wants to buy one single tripod that includes everything you need for rock-solid stability, this one is it.
You won’t get a carbon fiber build, and good luck stuffing this beast in a backpack – but it is rock solid, has easy-to-use flip locks to extend the legs, and reaches a stratospheric height of more than 72 inches. It will handle any situation you can throw at it as long as you’re able to lug it to your location.
While you can customize this tripod with a different ball head, the included 3-way pan/tilt head is excellent for landscape photography. It offers a more careful, considered approach than the knob-turning of other ball heads, and the large adjustment handles connect you to the tripod in a way that I really like. As with other high-end Manfrotto tripods, the center column can be repositioned horizontally for even greater maneuverability.
Pros
- Great compromise between features, flexibility, and price
- Sturdy, supportive legs
- Can extend over six feet
Cons
- Included pan/tilt head is not suited for everyone
- Not very portable
- Load limit is good but not great considering the size
8. Vanguard Alta Pro 263AP (Most flexible tripod)
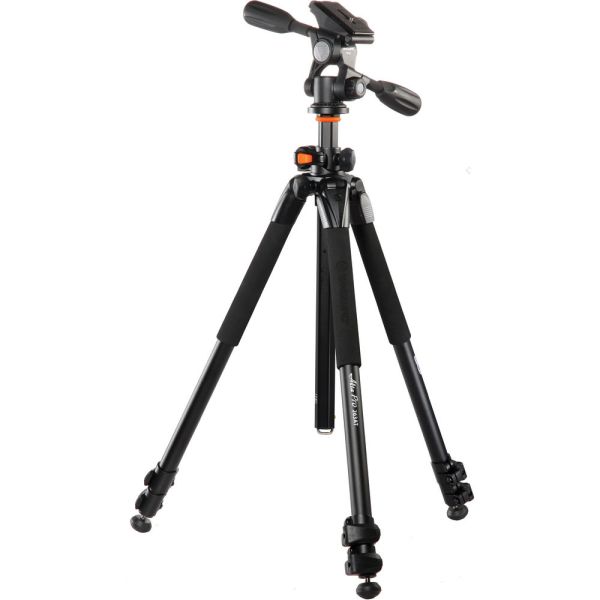
The Vanguard Alta Pro 263AP is an excellent option for landscape photographers who want advanced features at a much more reasonable price point than Gitzo or Feisol tripods. It’s relatively compact – though not as diminutive as the Peak Design Travel Tripod – and extends to a very respectable 70 inches. The center column can be positioned in a variety of ways, and the ball head can be rotated and repositioned in almost every manner imaginable.
What I really like about this tripod for landscape photography are the little touches that make your shooting experience just a little more pleasant. The feet have metal tips for maximum stability (and while they might not seem especially useful, you’d be surprised how often they come in handy when you’re shooting in the great outdoors!). The center column can be repositioned while also adjusting its height, allowing you a near-unprecedented level of versatility.
And while some photographers would rather have a more traditional ball head, I do appreciate the large, easy-to-use handles that let you adjust pan, tilt, and rotation separately. I wouldn’t hesitate to recommend this tripod to most photographers, as it is well-suited to almost any photographic situation.
Pros
- Relatively inexpensive compared to some others on this list
- Highly versatile
- Great for a variety of situations, not just landscapes
Cons
- Included tripod head is not to everyone’s liking
- Not very small when collapsed
9. Joby GorillaPod with smartphone mount (Best tripod for smartphone landscape photography)
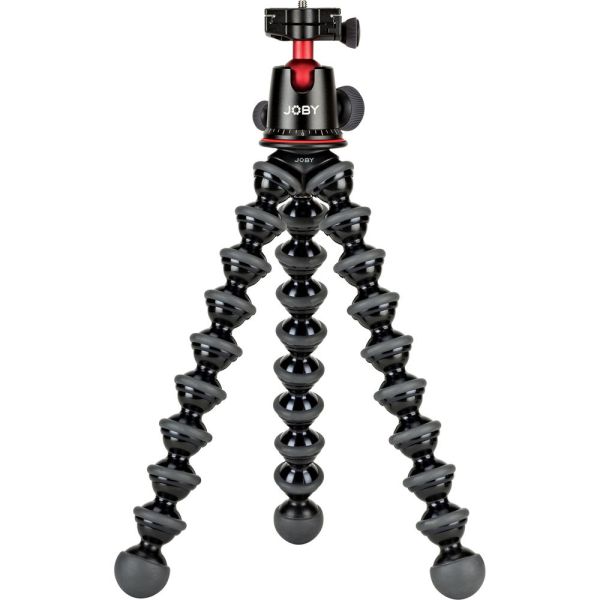
It’s often said that the best camera is the one you have with you, and for many people, that means their mobile phone. Extend that maxim just a bit, and we might say that the best tripod is the one you have with you. For landscape photographers who rely on their smartphone to create landscape images, this tiny Joby tripod is one that I’m always happy to recommend. Its unique wraparound legs let you capture stable images on just about any surface imaginable, and the entire tripod can be wrapped around objects, including trees, fence posts, benches, and more.
While I wouldn’t recommend a GorillaPod to anyone who shoots with a DSLR or mirrorless camera, it’s ideal for mobile phone shooters. The tripod will sit firmly in place with a phone attached, and the ball head is great for repositioning your phone to get your shot just right. It’s small, light, highly portable, and comes at a very reasonable price.
If you shoot landscapes with your mobile phone, there’s almost no reason not to get this tripod. And despite some limitations, it’s a great solution and a welcome addition to your gear kit.
Pros
- Inexpensive
- Small
- Flexible
- Highly portable
Cons
- Very short
- Not well suited for dedicated cameras
How to choose the perfect landscape photography tripod
A tripod is an essential piece of equipment for a landscape photographer. Sure, you won’t always need to use it. But you’ll find yourself in situations where it can help you capture a high-quality image you wouldn’t be able to get otherwise.
But how do you choose the right tripod? There are hundreds (if not thousands) of options out there, with prices ranging from $10 to more than $1000. How do you know which one will best suit your needs?
The first tripods I bought were cheap $20 aluminum models from the local electronic shop. While most photographers start with such a tripod, I strongly advise you not to buy one. For landscape photography, they simply won’t do a good job. In some situations, they may even do more harm than good (and they also break more easily than a higher-quality model).
So what should you consider before purchasing your next tripod for capturing landscapes? Here are a few things to keep in mind:
- Price and quality (i.e. what does your budget allow?)
- Flexibility
- Weight (aluminum vs carbon fiber)
Taking these topics into account before you buy will make it easier to find the best one for your needs.
Price
The first thing most of us consider is the price. Photography equipment is rarely cheap, and if you want quality, you need to pay for it. As I said earlier, a tripod can cost you anything from $10 to several thousand. But are more expensive tripods necessarily better?
In general, yes. A $1000 tripod will outperform a $200 tripod in most tests. But that doesn’t mean it’s the right one for you. Ask yourself what you need. What type of landscape photography do you do? Do you need the most expensive model? For most people, the answer is no.
Chances are a mid-range ($200) tripod will be more than adequate and perform perfectly in most scenarios.
Flexibility/height
What about specs? Should you choose a short tripod or a tall one? Can the legs spread wide, or are they locked into a fixed position? Do you prefer flip-locks or twist-locks?
Let’s start with the height. In most situations, you won’t need a tall tripod – yet if you shoot landscapes frequently enough, there may well come a time when you need that extra leg length. Is it worth paying extra for? If you often find yourself photographing in rivers, on top of rocks, or along rugged seasides, then yes. But if you’re not into extreme landscape photography and always mount your tripod on flat and stable ground, I wouldn’t bother.
Next, while a tall tripod is nice, it’s also handy to have one that lets you get close to the ground. For this next image, the tripod held my camera just a few inches off the ground, which allowed me to get extra close to the flowers in the foreground:
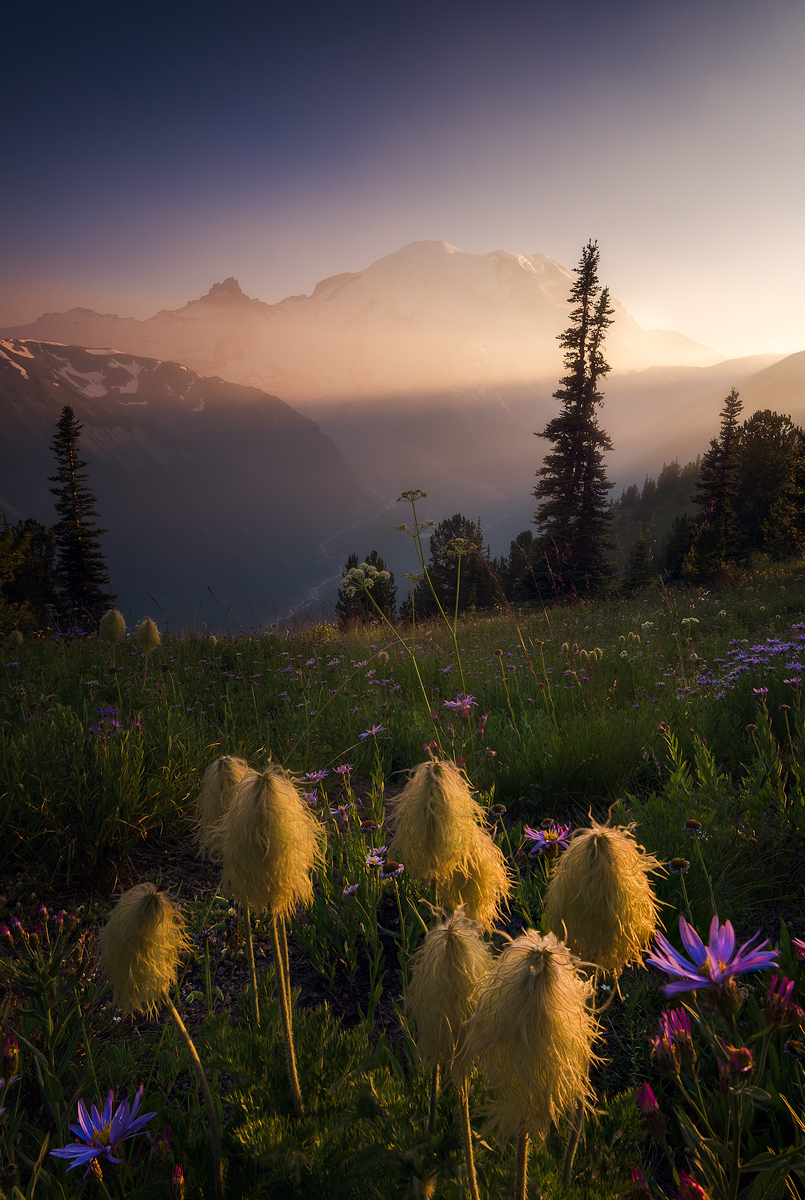
So what’s more important to you? Having a tall tripod or being able to take photographs from a low perspective?
The good news is that some of the more expensive tripods can give you both. While they can stand close to six feet tall, they can also lay more or less flat on the ground for those low-perspective scenic shots.
Weight
The final thing to consider is the tripod’s weight. This is important, especially if you head out on long hikes. Your backpack can get quite heavy once you add all the gear you need, so the last thing you want is unnecessary weight from a tripod.
Now, a lightweight tripod isn’t necessarily low-quality. In fact, some of the best tripods out there are lightweight. You just need to make sure they’re sturdy and can support the weight of your camera. Unfortunately, these tripods are rarely cheap and are often found at the higher end of the price range.
If you’re an avid hiker and tend to go a long way to photograph your subjects, I strongly recommend looking into a lightweight carbon fiber tripod. These tripods are just as sturdy (if not more sturdy) than the heavier aluminum alternatives.
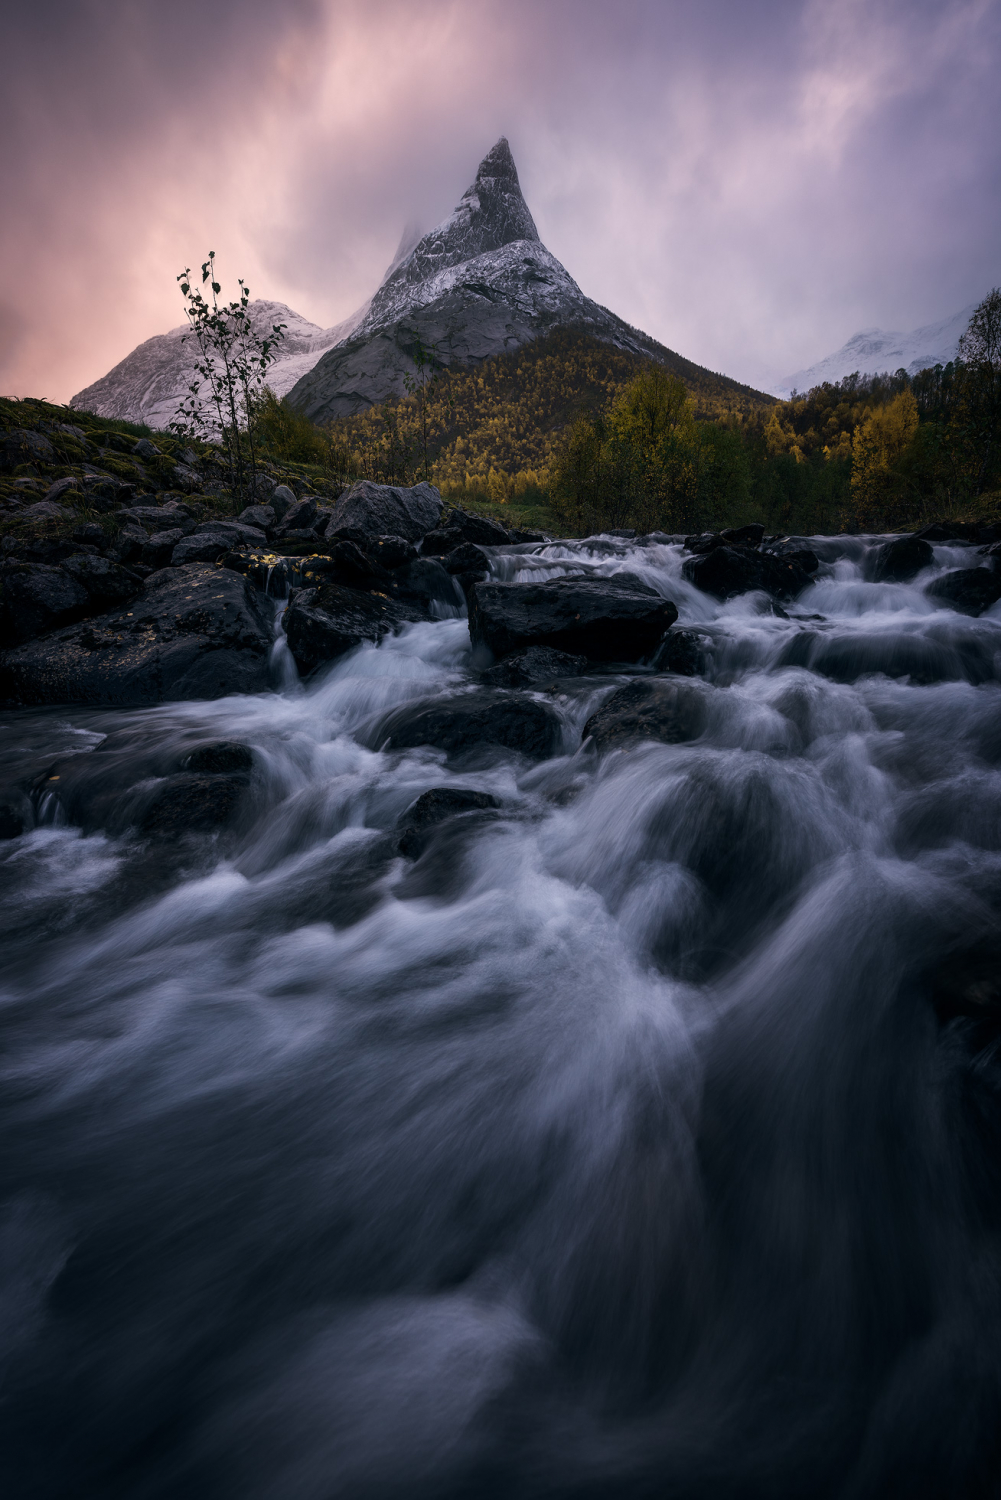
But if you’re not into hiking, weight might not be such an issue. In fact, if you photograph in rough conditions, you may prefer the extra weight. When photographing beaches in Arctic Norway, I depend on having a sturdy tripod that won’t break when hit by waves or move when the waves are receding. In these situations, a low-quality travel tripod is far from ideal. Even strong winds can make these tripods vibrate, leading to blurry images. A heavy and solid tripod is a much better option.
Which tripod should you buy?
Unfortunately, I can’t answer this question for you. It really depends on who you are and the kind of photographs you take. But when you’re ready to buy one, consider what I’ve talked about and ask yourself what you need. Do you need a light tripod you can easily bring on long hikes? Do you need a sturdy tripod that can handle wind and rough conditions? Perhaps you need a combination of the two.
And what about the price? Do you really need the most expensive model, or will a medium-priced alternative do the job?
Answering these questions should help you narrow down the options, and help you find the tripod that is best for you.
Personally, I have two tripods: a lightweight travel tripod I can bring on long hikes, and my main tripod that’s a little heavier (and more expensive) but solid enough to use in even the roughest Arctic conditions.
Tripods in landscape photography: a quick guide
Now that you’ve (hopefully) identified the right tripod, let’s take a look at how and when you should use a tripod for amazing landscape shots.
When is a tripod necessary for landscape photography?
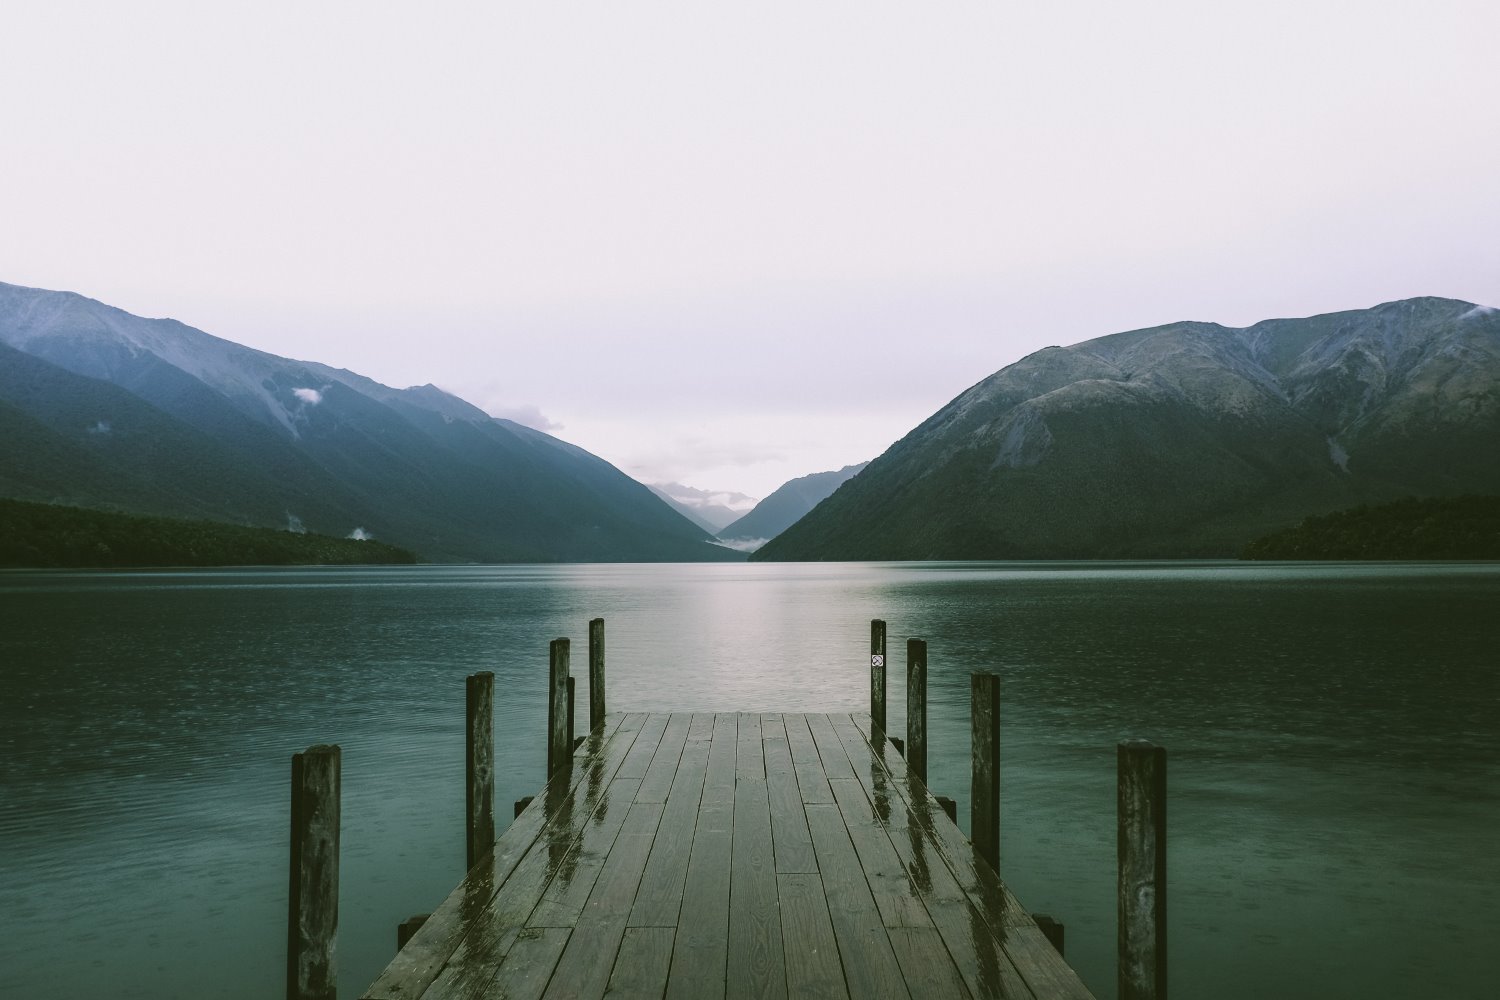
Tripods are bulky and heavy. For some, a tripod is just another object that makes shooting landscapes more difficult due to the inconvenience. So the question arises – is the effort worth the cost?
I certainly think so; for most forms of landscape photography, a tripod is an essential piece of equipment.
Tripods are essential for capturing razor-sharp images, especially in low-light situations where you want to keep your ISO low.
While increasing the ISO lets you use a quicker shutter speed, it can introduce unwanted grain/noise and reduce the overall quality of your image. But keeping the ISO low means you’ll need a longer shutter speed. (Yes, you can adjust the aperture. But I won’t be talking about that here).
Capturing a sharp image using a shutter speed of 1/10th of a second or slower with a handheld camera is almost impossible. It’s very difficult to avoid any camera movement which, with such a slow shutter speed, means you’ll introduce some blur into the image.
Mounting the camera on a tripod lets you use slower shutter speeds and still capture sharp images. The camera sits still on the tripod, so you don’t have to worry about the motion of you holding it.
Using a tripod also allows you to use even slower shutter speeds and capture long exposures (i.e. images that make use of extra slow shutter speeds).
Tips for using a tripod in landscape photography
Over the years, I’ve learned some hard lessons when it comes to landscape photography and the obligatory use of a tripod. Love them or loathe them, tripods are an essential piece of kit for landscape photography. With these 5 simple tips, I hope to help you love your tripod and improve your photography experience.
1. When going vertical, use the right approach
When you need to shoot a vertical image, you’ll find it much more comfortable to tilt your camera to the left (counterclockwise) when using a ball head. If you tilt it to the right (clockwise), you’ll discover that things get really cramped, especially if you want to get your camera low to the ground; you may not be able to physically fit your arm in the space you’ve got left.
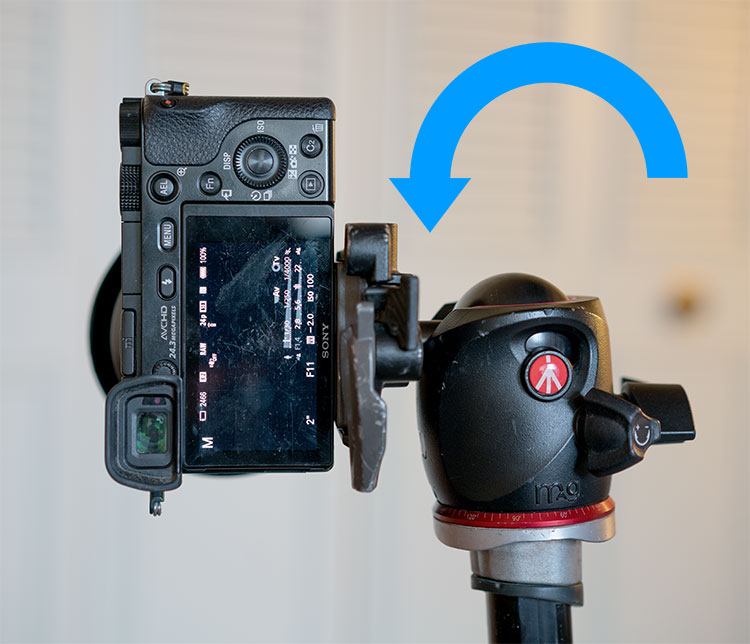
Also, most cameras also have the battery compartment under the handgrip on the right side, so when you need to change batteries, you’ll find it much easier if your camera is tilted to the left. If you look at the image above, you’ll notice all of the camera controls are easily accessible on the top of the camera.
2. Don’t force your tripod into position
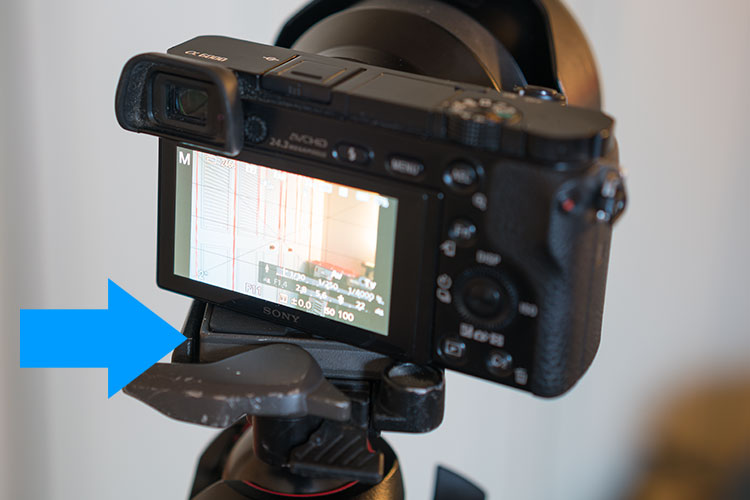
I often see my beginner students trying to use brute strength to reposition the camera on their ball head tripod. The result will eventually be a broken ball head, and on one extreme occasion, I actually watched the camera pop out of the clip and plummet to its untimely death.
So if you need to reposition your camera, simply loosen one of the locking mechanisms on the ball head, reposition it, and then tighten the locking mechanism. You’ve paid for all of that engineering; you might as well use it!
3. Let go of the tripod when you shoot
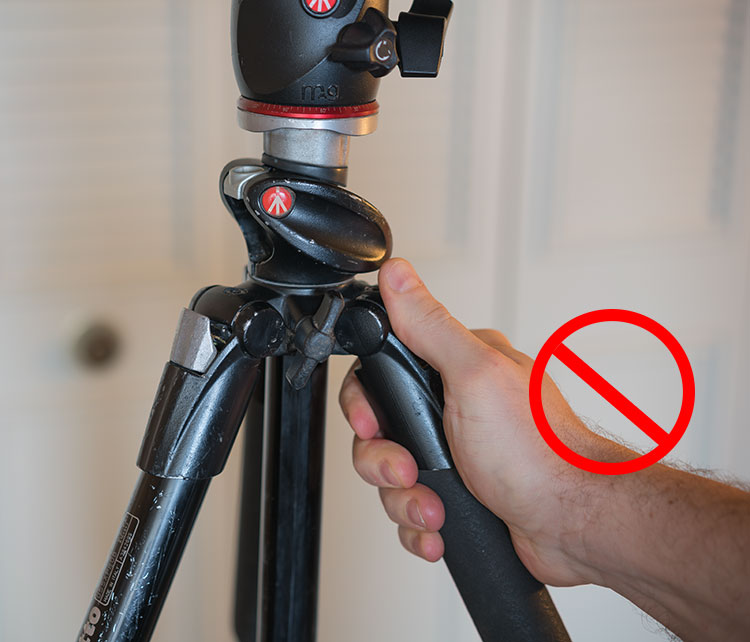
Sounds obvious, right? I’ve been shooting professionally for years, and yet I still occasionally do this. It makes sense to hold onto your tripod when shooting in gale-force winds. But in most circumstances, you won’t need to do that, and you’ll capture much sharper images without the vibration caused by your hands touching the tripod.
The purpose of a tripod is to keep your camera perfectly still so that you capture a sharp image. Touching it defeats the purpose – so hands off!
4. Make sure everything is locked down tight
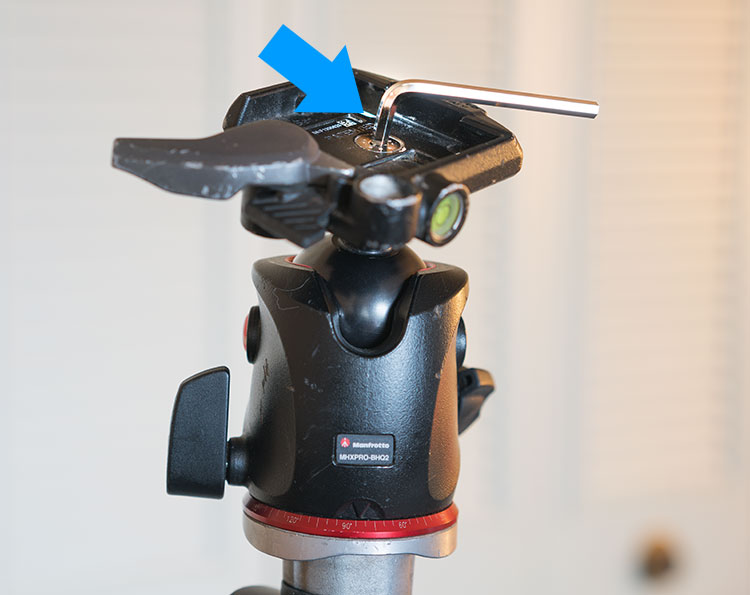
A common problem with tripods is that the screw that attaches the clip mount to the ball head works itself loose. Be sure to always carry the correct hex key for those rare but vitally important moments when you need to apply a bit of tightening.
I also recommend that you make sure that all of the other mechanisms on your tripod are firmly locked down. If there’s even the slightest amount of play, you’ll have problems during post-processing if your images don’t line up and you plan on blending multiple exposures.
Check that the legs lock securely, as well; the screws may need to be tightened from time to time. Sometimes the legs work themselves loose and can slowly close in on themselves, causing movement during your exposure or even the entire tripod to collapse.
5. Empty the water out of the tripod legs afterward
If you do a lot of shooting in rivers, lakes, and oceans, you’ll discover that your telescopic tripod legs magically suck in and store water. To avoid a surprise drowning of your camera, be sure to remove the camera before you pick up the tripod and tip it upside down. Otherwise, water from the legs will pour out of the top of the tripod – all over your precious camera.
It’s also a good idea to do this before putting the tripod back in your car, tent, or camera bag. The last thing you want is a soggy tent!
One more resource for landscape tripod photography
In this video from Julian Elliott Photography, you get seven handy tips for using a tripod in landscape and travel photography:
So watch Julian’s video and find out how to get the most out of your tripod, how to keep it in good condition, and how to use it.
The best tripod for landscape photography: final words
While you don’t necessarily need a tripod for landscape photography, it will get you consistently better results. You can use lower ISO values, narrower apertures, and longer shutter speeds, plus you can capture shots you just can’t reach when shooting handheld.
If you’re looking for your first tripod, or if you already have a tripod and are aiming to upgrade, hopefully one of the options on this list will be just right for you!
And remember, these are my personal picks for the best tripods for landscape photography, but if you have a favorite I would love to hear about it – so leave your thoughts – and share any of your own landscape photos – in the comments below.
Landscape tripod FAQ
Try to not think about this in objective, black-and-white terms. There are pros and cons to every tripod brand and plenty of tradeoffs. Instead of thinking about which brand is best, think about your needs, then choose a tripod that fits your budget.
Some tripods advertise features like weatherproof knobs and dials, but I really don’t worry about this sort of thing too much. I wouldn’t recommend paying more for these features unless you have a specific use case in mind. Outside of using using your tripod in torrential rain every single day, any model will probably be fine.
Any camera will work for landscapes, from mobile phones to point and shoots to high-end mirrorless and DSLR models. Landscape photographers generally prefer wider lenses to capture more of the scene, but it’s also possible to get great landscape shots with a telephoto lens. Your camera is almost certainly not the limiting factor in landscape photography; no matter what camera you shoot with, a tripod will almost certainly help.
Some people prefer ball heads, while others prefer pan-and-tilt heads. There’s no one answer to this, but I personally gravitate towards ball heads simply for the size and convenience factor. One thing I do not recommend is using a tripod head designed for videography when shooting still photos. They generally do not allow the same level of free-form movement and positioning as a head designed for still images.
